Full guide for deploying a static website to S3 with HTTPS
24 Oct, 2020As the name suggest, today I will show you how you can use AWS to deploy a static website to S3 and also configure SSL. I know, the internet is full of this kind of tutorials, but I could not found one that shows you in detail how to configure every service that is needed for a fully fledged static website.
Requirements:
- AWS CLI for uploading your static site to S3
- Domain
- Gatsby
Install AWS CLI
- To push your content to S3, we need to Install AWS CLI.
AWS Services used:
- S3 for deployment
- Route53 for routing site to CloudFlare
- AWS Certificate Manager to get a FREE SSL certificate
- CloudFlare for caching content on edge locations
1. Go and get a free domain if you don’t have one already
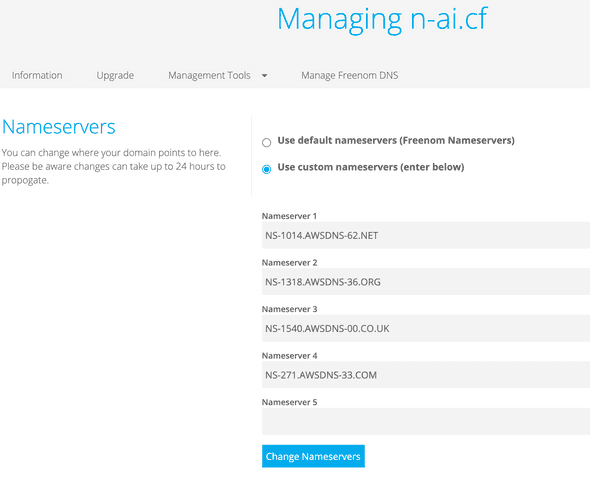
Hit www.freenom.com and register a free custom domain. We will later on need to change the nameservers to point to your Route53 hosted zone.
I just registered for free n-ai.cf.
2. Create a static website
Choose one of the following ways to install and build a static site using Gatsby:
Using Gatsby globally:
- Install Gatsby cli
npm install -g gatsby-cli
- Create a blog using one starter template provided by Gatsby
gatsby new gatsby-starter-blog https://github.com/gatsbyjs/gatsby-starter-blog
- Build your blog
gatsby build
Using Gatsby locally
- Clone repository with gatsby template:
git clone https://github.com/gatsbyjs/gatsby-starter-blog
- Install dependencies
cd gatsby-starter-blog && npm install
- Build your blog
npm run build
At the end of creating a static website section, we will have a new public folder in gatsby-starter-blog. The public folder contains all the necessary files for your static website to work properly.
3. Create an S3 bucket and upload the static website
- Create a S3 bucket
Go ahead and open up the AWS console and navigate to S3. All of the resources will be created on region us-east-1.
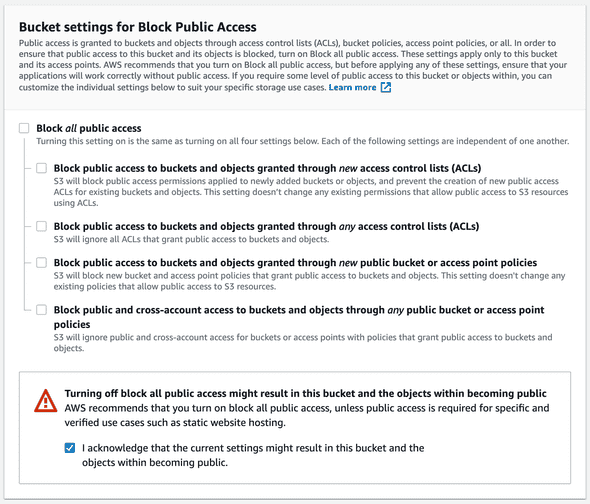
Hit Create bucket and make sure that you untick Block all public access from under Bucket settings for Block Public Access.
We do this because we what your site to be available to the world.
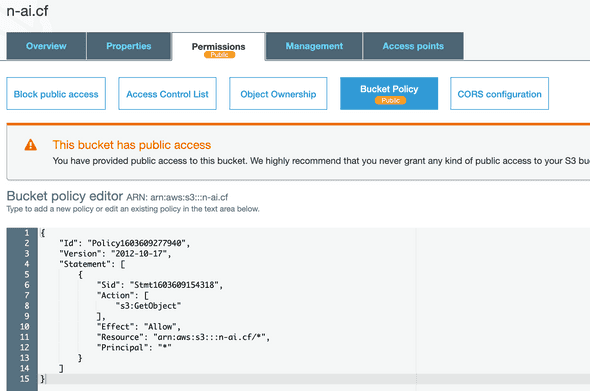
- Generate a policy for your bucket
Go to AWS Policy Generator and generate a public s3:GetObject action for your arn:aws:s3:::<bucket-name>/* resource:
{
    "Version": "2012-10-17",
    "Id": "Policy1603609277940",
    "Statement": [
        {
            "Sid": "Stmt1603609154318",
            "Effect": "Allow",
            "Principal": "*",
            "Action": "s3:GetObject",
            "Resource": "arn:aws:s3:::<your_bucket>/*"
        }
    ]
}
- Add the policy to your bucket
- Enable
Static website hostingfor your domain. At this step you need to configure which is the file that will be first requested when someone visits your website and the error page.
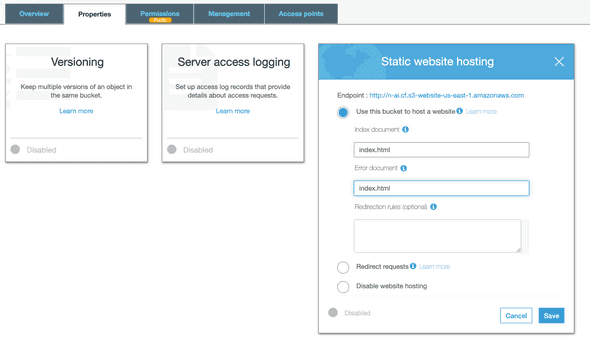
Before uploading the content using AWS CLI, you must first be sure that your user has programmatic access enabled and you have the approriate rights to create objects on S3.
4. Upload the static website
Create a user with programmatic access to S3
Navigate to the folder where you have your gatsby-starter-blog template and cd public folder.
Run:
aws s3 sync . s3://n-ai.cf
After this step, all the files from the public directory will be live on S3.
You can access the bucket with the URL that looks like:
http://<your-bucket-name>.s3-website-us-east-1.amazonaws.com/All the contents of your bucket should now be available for anyone on the web:
5. Create a hosted zone using Route53
- Access Route53 from AWS console
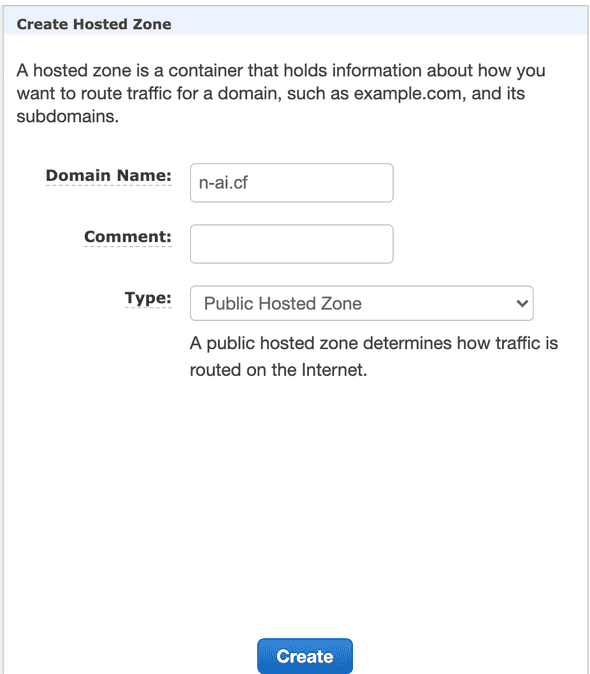
- Create a new hosted zone, this will cost you a fixed 0.50$/month for the first 25 hosted zones created.
Just type in the Domain name and hit Create
6. Edit NS record for your domain
- Copy the NS records provided by AWS when we created your hosted zone
- Paste the new NS records in your freenom acount for the specific domain
7. Create a SSL certificate
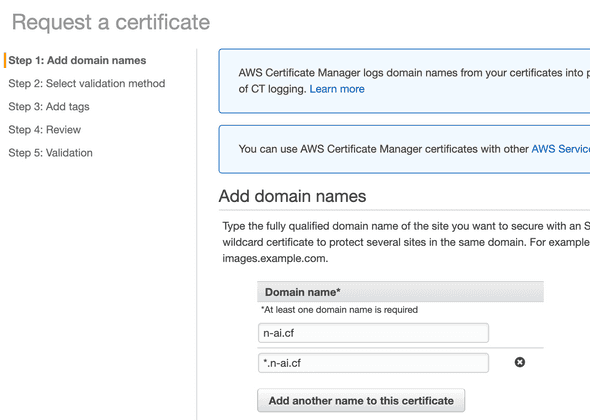
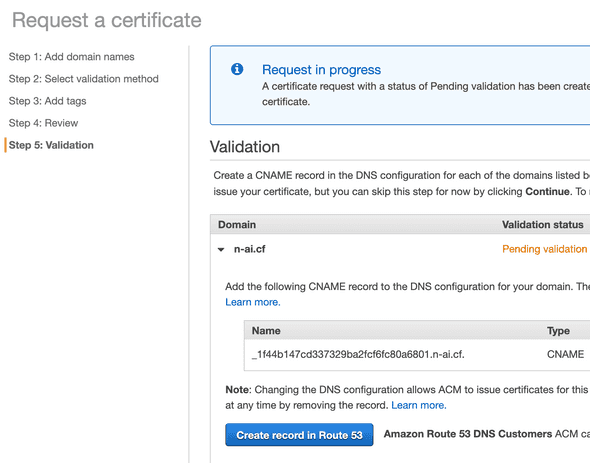
- Access Certificate Manager from AWS console and request a new public certificate and be happy as public SSL certificates from AWS are FREE.
As domain names:
- n-ai.cf
- *.n-ai.cf
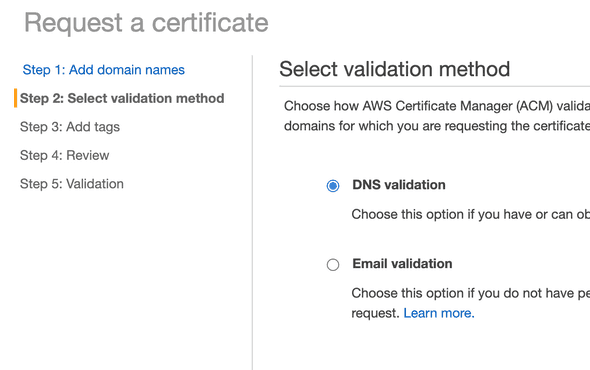
- Choose
DNS Validation
- Because we already have a hosted zone, AWS can insert a
CNAMErecord with a click of a button. - Hit
Create record in Route 53
8. Create a CloudFront Distribution
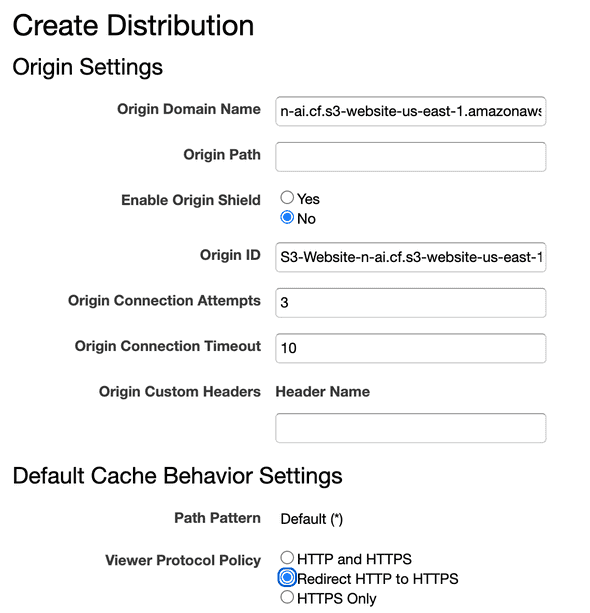
- Access CloudFront from AWS Console and hit
Create Distribution - Select Web Distribution
- Set
Origin Domain Namepointing to your static hosted bucket URL. Be aware that by default in the dropdown you’ll see the name of the bucket, but that one is not the url to your static hosted bucket. To find exact the url to your static hosted bucket you need to access S3 and copy the URL from the Static Hosted Website that AWS provided when you first changed the properties for your bucket.
It will look like:
http://<bucket-name>.s3-website-us-east-1.amazonaws.com- Set
Viewer Protocol PolicytoRedirect HTTP to HTTPS
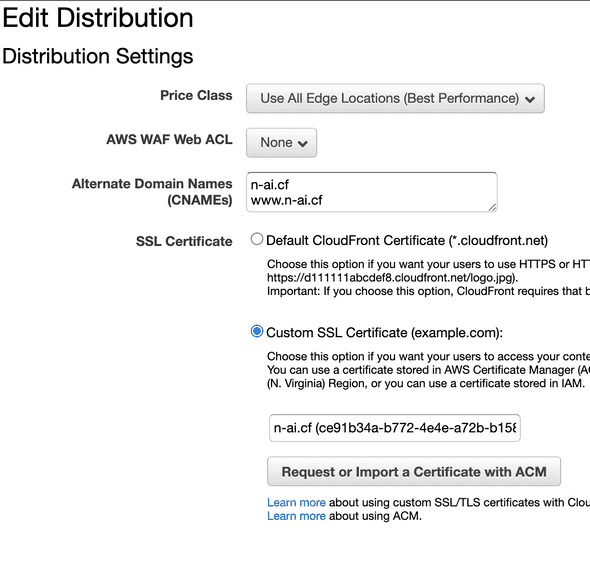
- Set
Alternate Domain Names (CNAMEs)to the name of your website.
In our case n-ai.cf and *.n-ai.cf because we want our site to also be available using www.
Adding *.n-ai.cf will enable Route53 to automatically detect your alias when you want to create one. We will see how all this lay our in the next section.
- Select the SSL certificate that we created for our website under
SSL Certificate->Custom SSL Certificate
- Hit
Create Distribution
After max 15 minutes CloudFront will finish deploying all your files and you’ll have a link to access your CloudFront Distribution under Domain Name for your specifc distribution ID.
8. Wire Route 53 to our CloudFront Distribution
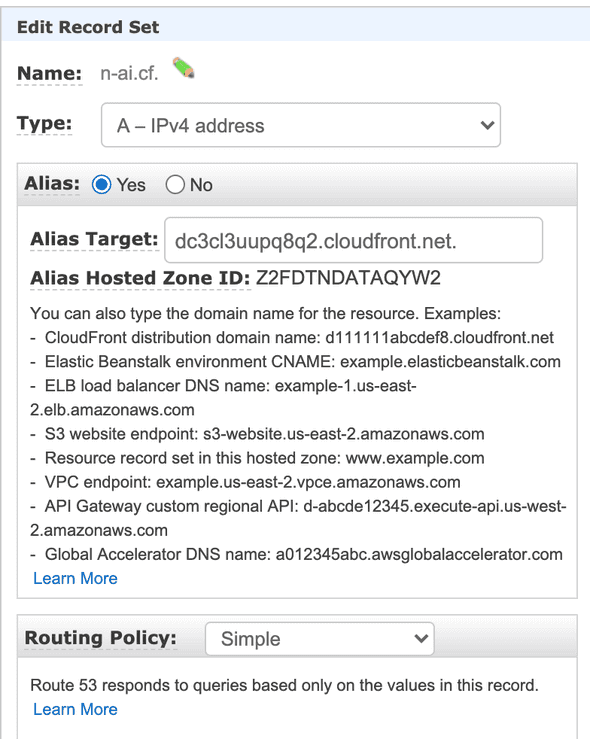
Now that we have everthing set up, all that remains is to route traffic comming from www.n-ai.cf or n-ai.cf to the newly created CloudFront Distribution.
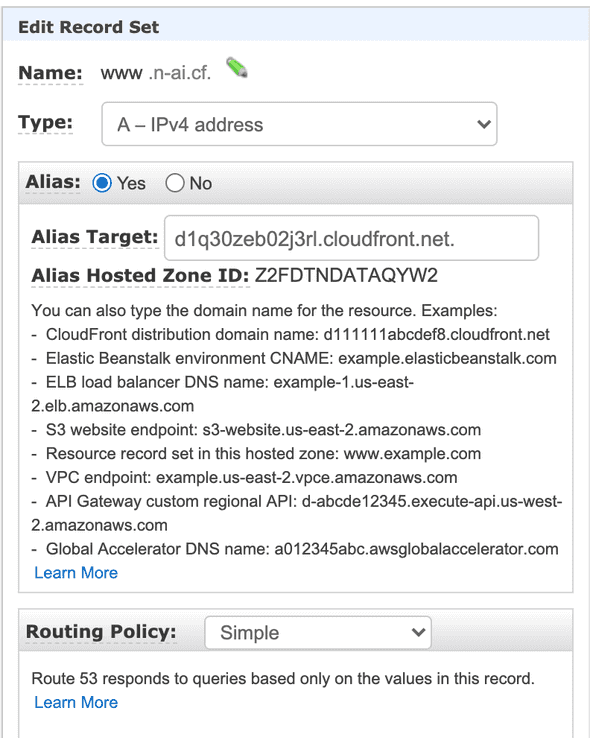
- Open up Route 53 and create a new record set for your domain:
- Add a new record set type alis for
www.n-ai.cf
Done
Now your site should be highly available when you type your domain name into the browser.

